
In today’s fast-paced digital world, building dynamic and responsive web applications is essential to meet user expectations. To achieve this, developers often rely on powerful frameworks that simplify the development process. In this blog, we’ll delve into the combination of Django DRF (Django Rest Framework) and React JS, two widely used technologies that seamlessly work together to create robust and interactive web applications.
Note: At the end of this blog, we have shared the github project.
Table of contents
Understanding Django DRF and React JS
Django Rest Framework (DRF) is a powerful toolkit for building Web APIs in Django applications. It allows developers to easily create APIs with features like authentication, serialization, and pagination. React JS, on the other hand, is a popular JavaScript library for building user interfaces, particularly single-page applications (SPAs). Combining these two technologies can result in a seamless, efficient, and interactive web application.
Understanding CORS and Cross-Origin Communication
Cross-Origin Resource Sharing (CORS) is a browser security feature that prevents web pages from making requests to a different domain than the one that served the web page. This feature is essential for maintaining security but can pose challenges when building web applications that require interaction between different domains. In this example, we’ll create a Ping-Pong application to demonstrate how to overcome CORS restrictions.
Prerequisites
Before we begin, ensure you have the following prerequisites in place:
- Python installed on your system.
- Node JS installed on your system. Click here to install.
Note: For this tutorial, we are using our basic skeleton project for Django. You can also download the project from here.
Create Django Project for Backend
Lets start by creating a sample ping pong project. Set up a Django view using Django Rest Framework (DRF) to return a simple “ping” response from a URL
Step 1: Install Django and Django Rest Framework
Install Django and Django Rest Framework within the activated virtual environment:
pip install django
pip install djangorestframework
pip install django-cors-headers
Step 2: Create a project and new Django app:
Assuming you have your Django project set up, create a new app or use an existing one. For this example, let’s assume the app is named “myapp”.
# create django project (if not created)
django-admin startproject mydrfproject

# Move to project
cd project

# Create app
django-admin startapp myapp
Step 3: Configure the Project Settings
Open the settings.py file inside the mydrfproject folder and update the INSTALLED_APPS list to include Django Rest Framework, CORS and app:
# mydrfproject/settings.py

INSTALLED_APPS = [
    # ...
    'rest_framework',
    'corsheaders',
    'myapp',
    # ...
]

MIDDLEWARE = [
    # ...
    'corsheaders.middleware.CorsMiddleware',
    # ...
]

CORS_ALLOWED_ORIGINS = [
    "http://localhost:3000",  # Add your React app's URL
]
Step 4: Define a view in the views.py file:
In your app’s views.py file, define a simple view that returns a “ping” response.
from rest_framework.views import APIView
from rest_framework.response import Response
from rest_framework import status

class PingView(APIView):
    def get(self, request):
        return Response({"message": "pong"}, status=status.HTTP_200_OK)
Step 5: Configure URLs in the urls.py file:
In your app’s created urls.py file, configure a URL route that maps to the PingView:
from django.urls import path
from .views import PingView

urlpatterns = [
    path('ping/', PingView.as_view(), name='ping'),
]
In your main project urls.py file, add URL route for your app:
# mydrfproject/urls.py

from django.contrib import admin
from django.urls import path, include

urlpatterns = [
    path('admin/', admin.site.urls),
    path('api/', include('myapp.urls')),
]
Step 4: Access the “ping” response:
Run your Django development server:
python manage.py runserverWith the server running, and check you can access the “ping” response by visiting the URL: http://localhost:8000/api/ping/.
Now we have completed our Django Backend Project. Lets move to create React App.
Create React Project for Frontend
We will be using create-react-app for creating our reactjs project. Install it using command npm install -g create-react-app
Step 1: Creating a Frontend with React JS
Inside your project directory, create a new directory for the React frontend. Use the following commands:
npx create-react-app frontend
cd frontend
npm install axios
npm start
Replace the contents of src/App.js with the following code.
import React, { useState, useEffect } from 'react';
import axios from 'axios';

function App() {
  const [pingResponse, setPingResponse] = useState(null);

  useEffect(() => {
    fetchPing();
  }, []);

  const fetchPing = async () => {
    try {
      const response = await axios.get('http://localhost:8000/api/ping/');
      setPingResponse(response.data.message);
    } catch (error) {
      console.error('Error fetching ping:', error);
    }
  };

  return (
    <div className="App">
      <h1>Ping-Pong App</h1>
      {pingResponse !== null ? (
        <p>Response: {pingResponse}</p>
      ) : (
        <p>Loading...</p>
      )}
    </div>
  );
}

export default App;
Step 2: Testing the ReatJs and Django
Start the Django development server in one terminal
python manage.py runserverStart the React development server in another terminal
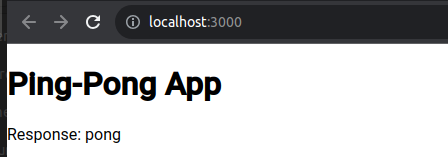
npm startAccess the React app at http://localhost:3000 and observe the successful “ping-pong” interaction between the two domains.
Conclusion
In this blog post, we explored how to overcome Cross-Origin Resource Sharing (CORS) restrictions by building a Ping-Pong application using Django and ReactJS. We set up a Django backend to return a “pong” response and a ReactJS frontend to make a “ping” request. By enabling CORS and configuring the necessary settings, we established cross-origin communication between the two domains, enabling seamless interaction. This example provides a foundational understanding of how to handle CORS issues and build web applications that communicate across different origins.
Find this tutorial on Github.
Blogs You Might Like to Read!
- Simple JWT Authentication with Django REST Framework
- Django Rest Framework Best Practices for Building Powerful APIs
- Best Folder and Directory Structure for a Django Project
- Put Method Request In Django REST Framework (DRF)
- POST Method / Request in Django Rest Framework
- DELETE Method In Django REST Framework
- How to Combine all API Methods like Get, Post, Put, Delete in One View