
In web applications, image manipulation is a common requirement. Cropping images before uploading can be especially useful when you want to allow users to focus on specific parts of an image. In this blog post, we’ll guide you through the process of implementing image cropping before upload in a Django web application. We’ll cover everything from setting up your project to integrating a client-side JavaScript library and handling image processing on the server side.
Step by Step Implementation
Lets dive into image cropping in django website using cropper.js plugin.
Step 1: Setting Up Your Django Project
Assuming you have an existing Django project, ensure your models, views, and templates are set up to handle image uploads. We have used from which we developed in our Django Basic Template Boilerplate Skeleton Project blog. For this tutorial, we have created a project with name myproject and app named myapp
Make Sure that you install Pillow Dependency to Handle Images Operations in Django
pip install PillowAdd media and static path in settings.py and urls.py
# settings.py

STATIC_URL = 'static/'
STATICFILES_DIRS=[BASE_DIR/'static']

MEDIA_URL ='/media/'
MEDIA_ROOT = BASE_DIR /'media'
from django.contrib import admin
from django.urls import path, include
from django.conf.urls.static import static
from django.conf import settings
urlpatterns = [
path('admin/', admin.site.urls),
path('', include('myapp.urls')),
]
urlpatterns += static(settings.STATIC_URL, document_root=settings.STATIC_ROOT)
urlpatterns += static(settings.MEDIA_URL, document_root=settings.MEDIA_ROOT)Step 2: Create Model
Create a Django model that stores image details.
from django.db import models

class CroppedImage(models.Model):
    file = models.ImageField(upload_to='images')
    uploaded = models.DateTimeField(auto_now_add=True)

    def __str__(self):
        return str(self.pk)
Migrate the model:
python manage.py makemigrations
python manage.py migrate
Step 3. Creating an Image Upload Form
Create a Django form that allows users to upload an image. Include an <input> element of type “file” for selecting the image file.
from django import forms
from .models import CroppedImage

class ImageUploadForm(forms.ModelForm):
    class Meta:
        model = CroppedImage
        fields = ('file',)
Step 4: Handling Image Upload and Cropping on the Server
In your Django view, process the uploaded image and apply the cropping coordinates as needed. You can use libraries like Pillow to manipulate images on the server side.
# myapp/views.py

from django.shortcuts import render
from .forms import ImageUploadForm
from django.http import JsonResponse
from django.http import HttpResponse


def upload_and_crop(request):
    form = ImageUploadForm(request.POST or None, request.FILES or None)
    if form.is_valid():
        form.save()
        return JsonResponse({'message': 'works'})
    context = {'form': form}
    return render(request, 'crop.html', context)
Create a urls.py in your app and reference it view
# myapp/urls.py

from django.urls import path
from . import views

urlpatterns = [
    path('hello/', views.hello_world, name='hello_world'),
    path('crop-image/', views.upload_and_crop, name='upload_and_crop'),
]
Step 5. Initializing and Handling Image Cropping
Create a templates named folder and in that create crop.html which we are using in views and add the following code
{% load static %}
<!doctype html>
<html lang="en">

<head>
  <!-- Required meta tags -->
  <meta charset="utf-8">
  <meta name="viewport" content="width=device-width, initial-scale=1, shrink-to-fit=no">

  <!-- favicon -->
  <link rel="shortcut icon" type="image/png" href="{% static 'favicon.ico' %}" />
  <!-- Bootstrap CSS -->
  <link rel="stylesheet" href="https://cdn.jsdelivr.net/npm/[email protected]/dist/css/bootstrap.min.css"
    integrity="sha384-TX8t27EcRE3e/ihU7zmQxVncDAy5uIKz4rEkgIXeMed4M0jlfIDPvg6uqKI2xXr2" crossorigin="anonymous">

  <!-- jquery -->
  <script src="https://code.jquery.com/jquery-3.5.1.min.js"></script>

  <!-- cropper -->
  <script src="https://cdnjs.cloudflare.com/ajax/libs/cropper/4.1.0/cropper.min.js"></script>
  <link rel="stylesheet" href="https://cdnjs.cloudflare.com/ajax/libs/cropper/4.1.0/cropper.min.css">

  <!-- custom js-->
  <script src={% static 'crop-image.js' %} defer></script>

  <style>
    .not-visible {
        display: none;
    }
  </style>

  <title>image cropper</title>
</head>

<body>
  <div class="container mt-3">
    <div id="alert-box"></div>
    <div id="image-box" class="mb-3"></div>
    <form action="" id="image-form">
      {% csrf_token %}
      {{form.as_p}}
    </form>
    <button class="btn btn-primary mt-3 not-visible" id="confirm-btn">confirm</button>
  </div>
</body>

</html>
Now lets create static files. In project directory, create a folder named static and inside it crop-image.js and paste the below code
const alertBox = document.getElementById('alert-box')
const imageBox = document.getElementById('image-box')
const imageForm = document.getElementById('image-form')
const confirmBtn = document.getElementById('confirm-btn')
const input = document.getElementById('id_file')
const csrf = document.getElementsByName('csrfmiddlewaretoken')
input.addEventListener('change', () => {
alertBox.innerHTML = ""
confirmBtn.classList.remove('not-visible')
const img_data = input.files[0]
const url = URL.createObjectURL(img_data)
imageBox.innerHTML = `<img src="${url}" id="image" width="700px">`
var $image = $('#image')
console.log($image)
$image.cropper({
aspectRatio: 16 / 9,
crop: function (event) {
console.log(event.detail.x);
console.log(event.detail.y);
console.log(event.detail.width);
console.log(event.detail.height);
console.log(event.detail.rotate);
console.log(event.detail.scaleX);
console.log(event.detail.scaleY);
}
});
var cropper = $image.data('cropper');
confirmBtn.addEventListener('click', () => {
cropper.getCroppedCanvas().toBlob((blob) => {
console.log('confirmed')
const fd = new FormData();
fd.append('csrfmiddlewaretoken', csrf[0].value)
fd.append('file', blob, 'my-image.png');
$.ajax({
type: 'POST',
url: imageForm.action,
enctype: 'multipart/form-data',
data: fd,
success: function (response) {
console.log('success', response)
alertBox.innerHTML = `<div class="alert alert-success" role="alert">
Successfully saved and cropped the selected image
</div>`
},
error: function (error) {
console.log('error', error)
alertBox.innerHTML = `<div class="alert alert-danger" role="alert">
Ups...something went wrong
</div>`
},
cache: false,
contentType: false,
processData: false,
})
})
})
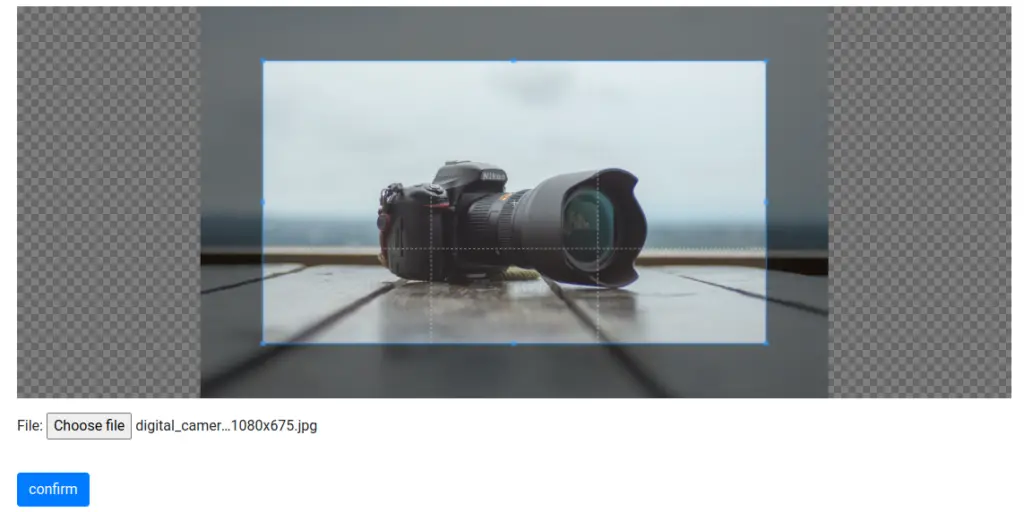
})That’s it! You’ve now implemented image cropping before upload in your Django website. Users can select an image, crop it as desired, and then upload the cropped version.
Run the project and go http://localhost:8000/crop-image/
python manage.py runserverFind this project on Github.
Blogs You Might Like to Read!
- Create Image Gallery with Multiple Image Upload in Django
- How to Upload Multiple Files in Django: Images, Files, PDF
- How to Upload and Download File in Django: PDF, Image, Any Format
- How to Upload and Display Any Image in Django: JPG, PNG, GIF
- How to Django Send Email with File Attachment: PDF, Images