
In today’s tech-savvy world, chatbots have become an integral part of various applications, from customer support to virtual assistants. Building a chatbot from scratch might seem like a daunting task, but with the power of Flask and ChatterBot, it becomes much more manageable. Flask is a lightweight and versatile web framework in Python, while ChatterBot is an open-source machine learning-based conversational dialog engine. In this tutorial, we will walk you through the process of creating a simple chatbot using Flask and ChatterBot, enabling you to add interactive conversational capabilities to your web applications.
For this tutorial, we will be building a specialized chatbot with a specific theme – answering user questions related to the Coronavirus Disease (Covid-19). Our chatbot will greet users, engage in interactive conversations, and provide accurate and helpful information about Covid-19. Through this project, we aim to create a web-based chatbot that serves as a reliable resource for users seeking information about the pandemic and its various aspects.
Prerequisites:
Before we begin, make sure you have the following prerequisites installed:
- Python Version (version <=3.8 or >=3.4)
- Flask (install using ‘pip install Flask’)
- HTML, CSS, and JavaScript (basic knowledge)
Note: Package ‘chatterbot’ requires Python Version: <=3.8 or >=3.4
Creating Chatbot using Flask and Chatterbot
We recommend you to first create your project with our instructions, then you can do changes according to your requriements.
Step 1: Installing Python 3.7 with pip3.7 along with Python3.10
This step is optional if you already have Python Version <=3.8 or >=3.4. Please check your python using this command – python -V or python3 -V
# Install Python 3.7 Version
sudo apt update
sudo apt install build-essential zlib1g-dev libncurses5-dev libgdbm-dev libnss3-dev libssl-dev libsqlite3-dev libreadline-dev libffi-dev wget libbz2-dev
sudo add-apt-repository ppa:deadsnakes/ppa
sudo apt install python3.7
python3.7 --version

# Install Pip
python3.7 -m pip install pip

# if you are getting distutils error
sudo apt-get install python3.7-distutils
Step 2: Create and Install Virtualenv for Python Version <=3.8 or >=3.4
As we will be using virtual environment for this project. Please read our blog on Using Virtual Environments for Python Projects, if you are not familar with virtualenv in Python.
Let’s install virtualenv using Python3.7
pip install virtualenvCreate virtualenv named venv and activate it.
python3.7 -m virtualenv venv
source venv/bin/activate
Please Note: When you have virtualenv activated, you will see python version 3.7. Outside virtualenv it will be different.
Step 3: Installing Required Libraries
pip install Flask
pip install ChatterBot==1.0.8
pip install chatterbot-corpus==1.2.0
pip install spacy==2.1.9
pip install nltk==3.8.1
Step 4: Initializing Flask App
Create a new Python file (app.py) and add the following code:
from chatbot import chatbot

from flask import Flask, render_template, request

app = Flask(__name__)
app.static_folder = 'static'

@app.route("/")
def home():
    return render_template("index.html")

@app.route("/get")
def get_bot_response():
    userText = request.args.get('msg')
    return str(chatbot.get_response(userText))


if __name__ == "__main__":
    app.run()
Step 5: Interact with Chatterbot Machine Learning Model
Create a new Python file (chatbot.py) and and add the following code:
from chatterbot import ChatBot
import spacy

spacy.cli.download("en_core_web_sm")
spacy.cli.download("en")

nlp = spacy.load('en_core_web_sm')

chatbot = ChatBot(
    'CoronaBot',
    storage_adapter='chatterbot.storage.SQLStorageAdapter',
    logic_adapters=[
        'chatterbot.logic.MathematicalEvaluation',
        'chatterbot.logic.TimeLogicAdapter',
        'chatterbot.logic.BestMatch',
        {
            'import_path': 'chatterbot.logic.BestMatch',
            'default_response': 'I am sorry, but I do not understand. I am still learning.',
            'maximum_similarity_threshold': 0.90
        }
    ],
    database_uri='sqlite:///database.sqlite3'
)

# Training With Own Questions
from chatterbot.trainers import ListTrainer

trainer = ListTrainer(chatbot)

training_data_quesans = open('training_data/ques_ans.txt').read().splitlines()
training_data_personal = open('training_data/personal_ques.txt').read().splitlines()

training_data = training_data_quesans + training_data_personal

trainer.train(training_data)

# Training With Corpus
from chatterbot.trainers import ChatterBotCorpusTrainer

trainer_corpus = ChatterBotCorpusTrainer(chatbot)

trainer_corpus.train(
    'chatterbot.corpus.english'
)
In above example, we are loading data from training_data/ques_ans.txt and training_data/personal_ques.txt. You can download the files from here.
Step 6: Creating Chatbot UI
- HTML Template (index.html) – Create a new HTML file
index.htmlinside the “templates” folder. Please copy the html content from here. - CSS File (style.css) – Create a new CSS file inside the “static” folder to style the chat interface. Please copy the css content from here.
Bellow is the folder structure your project should look like:
chatbot_project/
├── app.py
├── chatbot.py
├── venv
├── database.sqlite3.py
├── templates/
│   └── index.html
├── training_data/
│   ├── ques_ans.txt
│   └──personal_ques.txt
└── static/
    └── style.css
Step 7: Run the Flask App
Open your terminal, navigate to the chatbot_project directory, and execute the following command:
python3.7 app.pyStep 8: Interact with the Chatbot
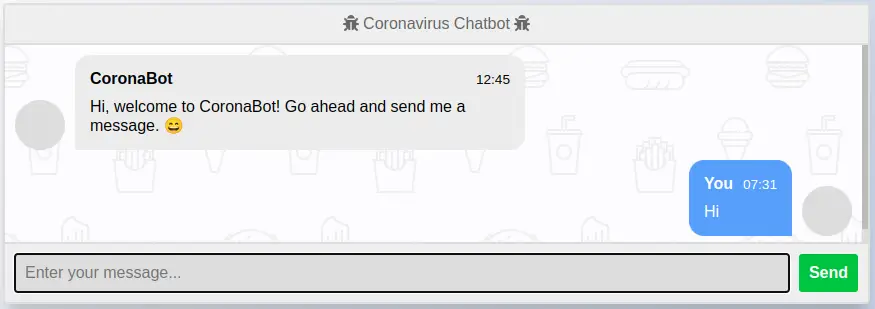
Open your web browser and go to http://localhost:5000 to access the chat interface. Now, you can type messages in the input field, press “Send,” and watch your chatbot respond!
Note – If you are not getting right answer for questions, delete the .sqlite3 database file from your folder and re-run the flask app.
Find this tutorial on Github.