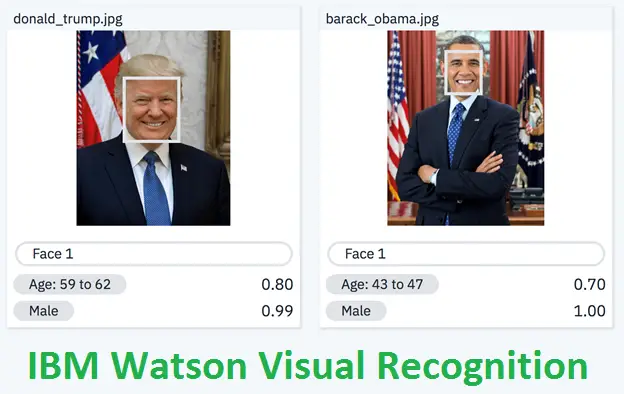
This tutorial, will teach you, how to use IBM Watson for finding objects in Images using Visual Recognition on IBM Cloud. I will teach you how to use IBM Cloud to use AI Visual Recognition API. We will be using Watson Visual Recognition for this project.

What you will be doing – On IBM Cloud, you will be uploading Images and IBM Watson identifies the various objects and faces, gender and age in your images. You will learn how to classify your images.
1. Create an IBM Cloud Account
- Sign up for IBM Cloud
- Go to Create a free account on IBM Cloud
- Enter the detail like email , name, etc.
- Click Create Account to create your IBM Cloud account.
- Confirm your email address
- Check your email, and in the email that was sent to you, click Confirm Account.
- Login to your IBM Cloud account
- On the Log in to IBM Cloud page, in the ID box, enter your email address and then click Continue.
2. Create a Watson Studio Resource
- Add Watson Studio as a resource
- On the Dashboard, click Create Resource.
- In the Catalog, check AI (16).
- In the list of Services, click Watson Studio.
- On the Watson Studio page, select the region closest to you, verify that the Lite plan is selected, and then click Create.
- When the Watson Studio resource is successfully created, you will see the Watson Studio page. Click Get Started.
- You will see this message when Watson Studio is successfully set up for you.
3. Create a project
- Create an empty project
- On the Watson Studio Welcome page, click Create a project.
- On the Create a project page, click Create an empty project.
- On the New project page, enter a Name and Description for your project.
- You must define storage for your project before you can create it. Under Select storage service, click Add.
- On the Cloud Object Storage page, verify that Lite is selected, and then click Create.
- In the Confirm Creation box, click Confirm.
- On the New project page, under Define storage, click Refresh, and then click Create.
4. Add a Watson VR Service instance
Requirements – We are going to Analyze Images, so we need to add the Watson Visual Recognition Service. For that download at least we need 10 images, you can use your own images, or download them from the internet.
- Add the Visual Recognition Service
- To add services to the project, click Add to project.
- In the Choose asset type box, click Visual Recognition.
- In the Associate a service box, click here.
- On the Visual Recognition page, verify that Lite is selected, and then click Create.
- In the Confirm Creation box, click Confirm.
- Analyze images with Watson VR
- To analyze your images, on the Models page, under Pre Built Models, in the General box, click Test.
- On the General page, click the Test tab.
- To upload images, on the Test tab, click Browse.
- Select the images you want to upload and then click Open.
- Once you have uploaded your images, Watson Studio Visual Recognition will tell you what it thinks it found in your images! Beside each class of object (or color, age, etc.), it gives you a confidence score (between 0 and 1) showing how confident it is that it found that particular object or feature in your image (0 for lowest confidence and 1 for highest confidence).
- Use the checkboxes on the left to filter the images. In this example, only images in which Watson VR has detected color are displayed.
- Use the Threshold slider to only display images in which Watson VR has at least 90% confidence of the color.
Conclusion – This is how you can analyze images in IBM Watson Visual Recognition.