When it comes to presenting data, Latex tables stand out as one of the most versatile and powerful tools. Latex, a typesetting system popular among researchers, scientists, and academics, offers robust capabilities for creating professional-looking tables for academic papers, reports, presentations, and more. In this comprehensive guide, we’ll delve into everything you need to know about Latex tables – from basic syntax to advanced customization options.
Also check our No Code/Low Online Latex Table Generator.
Table of Contents
How to Create Latex Table
You can create a latex table using the tabular command. Here’s a basic example to get you started:
\documentclass{article}
\begin{document}
\begin{table}[htbp]
\centering
\caption{Example Table}
\begin{tabular}{|c|c|c|}
\hline
\textbf{Column 1} & \textbf{Column 2} & \textbf{Column 3} \\
\hline
Row 1, Cell 1 & Row 1, Cell 2 & Row 1, Cell 3 \\
Row 2, Cell 1 & Row 2, Cell 2 & Row 2, Cell 3 \\
Row 3, Cell 1 & Row 3, Cell 2 & Row 3, Cell 3 \\
\hline
\end{tabular}
\label{tab:example}
\end{table}
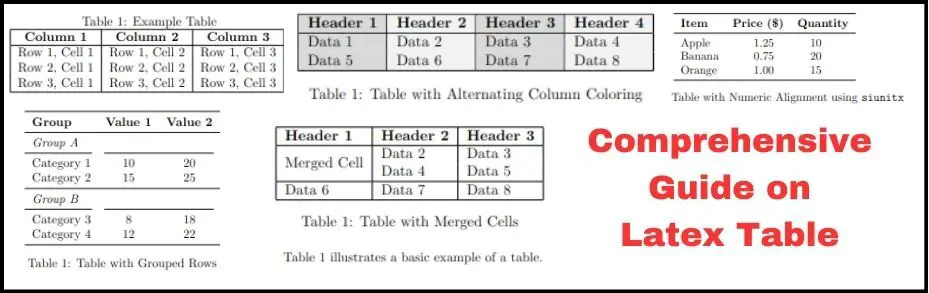
\end{document}Code creates a simple table with three columns and three rows. Here’s a breakdown of the key components:
\begin{table}[htbp] ... \end{table}: This defines a floating table environment.[htbp]specifies the preferred placement options (here: here, top, bottom, page), but LaTeX will decide the final placement.\centering: This centers the table horizontally within the text.\caption{Example Table}: This adds a caption to the table.\begin{tabular}{|c|c|c|} ... \end{tabular}: This is the tabular environment where you define the structure of the table.{ccc}specifies three columns, each centered (c). The vertical lines|draw vertical borders between cells.\hline: This draws horizontal lines.\textbf{...}: This makes the text within it bold.&: This separates entries within a row.\\: This starts a new row.
You can customize the table further by adjusting the number of columns, table alignment (c, l, r), adding more rows or adjusting formatting options.
Table with Caption
In above example, you can see we have used command \caption{Example Table}, which creates caption in latex table.
How to Change Position of Caption in Latex Table to Bottom
To change the position of the caption to the bottom of the table, you can use the \caption command after the tabular environment. Here’s code with the caption positioned at the bottom:
\documentclass{article}

\begin{document}

\begin{table}[htbp]
    \centering
    \begin{tabular}{|c|c|c|}
        \hline
        \textbf{Column 1} & \textbf{Column 2} & \textbf{Column 3} \\
        \hline
        Row 1, Cell 1 & Row 1, Cell 2 & Row 1, Cell 3 \\
        Row 2, Cell 1 & Row 2, Cell 2 & Row 2, Cell 3 \\
        Row 3, Cell 1 & Row 3, Cell 2 & Row 3, Cell 3 \\
        \hline
    \end{tabular}
    \caption{Example Table}
    \label{tab:example}
\end{table}

\end{document}
Latex Table Border
Here’s an example of a Latex table with inside borders and with full borders
Full Border in Table
\documentclass{article}
\usepackage{booktabs}

\begin{document}

\begin{table}[htbp]
    \centering
    \begin{tabular}{|c|c|c|}
        \hline
        \textbf{Column 1} & \textbf{Column 2} & \textbf{Column 3} \\
        \hline
        Data 1 & Data 2 & Data 3 \\
        Data 4 & Data 5 & Data 6 \\
        \hline
    \end{tabular}
    \caption{Table with full borders}
    \label{tab:full_borders}
\end{table}

\end{document}
Inside Border in Table
\documentclass{article}
\usepackage{booktabs}

\begin{document}

\begin{table}[h]
   \caption{Example LaTeX Table}
   \label{tab:example}
   \small
   \centering
   \begin{tabular}{l|c|c|r}
   \toprule
   \textbf{Header 1} & \textbf{Header 2} & \textbf{Header 3} & \textbf{Header 4} \\
   \midrule
   Item 1 & Item 2 & Item 3 & Item 4 \\
   \midrule
   Item 1 & Item 2 & Item 3 & Item 4\\
   \bottomrule
   \end{tabular}
\end{table}

\end{document}
Rotating Table in Latex (Vertical)
To create a vertical table in LaTeX, utilize the rotating package along with the sidewaystable environment. Here’s an example of how you can create a vertical table:
\documentclass{article}
\usepackage{rotating}
\usepackage{booktabs}

\begin{document}

\begin{sidewaystable}
    \centering
    \caption{Vertical Table Example}
    \begin{tabular}{@{}llll@{}}
        \toprule
        \textbf{Header 1} & \textbf{Header 2} & \textbf{Header 3} & \textbf{Header 4} \\ \midrule
        Row 1, Column 1    & Row 1, Column 2    & Row 1, Column 3    & Row 1, Column 4    \\
        Row 2, Column 1    & Row 2, Column 2    & Row 2, Column 3    & Row 2, Column 4    \\
        Row 3, Column 1    & Row 3, Column 2    & Row 3, Column 3    & Row 3, Column 4    \\
        Row 4, Column 1    & Row 4, Column 2    & Row 4, Column 3    & Row 4, Column 4    \\ \bottomrule
    \end{tabular}
\end{sidewaystable}

\end{document}
Table with Colored Rows
Single Row Color
Bellow code will generate a table with two columns. Rows 1, 2, and 4 have a white background, while Row 3 has a light gray background. You can adjust the colors and shades by modifying the values in \rowcolor{} according to your preferences.
\documentclass{article}
\usepackage[table]{xcolor}
\usepackage{array}

\begin{document}

\begin{table}[htbp]
    \centering
    \begin{tabular}{|l|l|}
        \hline
        \rowcolor{gray!30} \textbf{Header 1} & \textbf{Header 2} \\
        \hline
        Row 1 & Data 1 \\
        Row 2 & Data 2 \\
        \rowcolor{gray!15} Row 3 & Data 3 \\
        Row 4 & Data 4 \\
        \hline
    \end{tabular}
    \caption{Table with Colored Rows}
    \label{tab:colored_rows}
\end{table}

\end{document}
Alternate Row Color in Table
To create alternate row coloring in a LaTeX table, you can use the xcolor package along with the rowcolors command. Here’s an example:
\documentclass{article}
\usepackage[table]{xcolor}

\begin{document}

\begin{table}[htbp]
    \centering
    \rowcolors{2}{gray!25}{white} % Alternating row colors starting from the second row
    \begin{tabular}{|l|l|}
        \hline
        \rowcolor{gray!50} \textbf{Header 1} & \textbf{Header 2} \\
        \hline
        Row 1 & Data 1 \\
        Row 2 & Data 2 \\
        Row 3 & Data 3 \\
        Row 4 & Data 4 \\
        \hline
    \end{tabular}
    \caption{Table with Alternate Row Coloring}
    \label{tab:alternate_rows}
\end{table}

\end{document}
Alternate Column Color in Table
To create alternating column coloring in a LaTeX table, you can use the colortbl package along with the >{\columncolor} command. Here’s an example:
\documentclass{article}
\usepackage[table]{xcolor}
\usepackage{colortbl}

\begin{document}

\begin{table}[htbp]
    \centering
    \begin{tabular}{|>{\columncolor{gray!30}}l|>{\columncolor{gray!10}}l|>{\columncolor{gray!30}}l|>{\columncolor{gray!10}}l|}
        \hline
        \textbf{Header 1} & \textbf{Header 2} & \textbf{Header 3} & \textbf{Header 4} \\
        \hline
        Data 1 & Data 2 & Data 3 & Data 4 \\
        Data 5 & Data 6 & Data 7 & Data 8 \\
        \hline
    \end{tabular}
    \caption{Table with Alternating Column Coloring}
    \label{tab:alternate_columns}
\end{table}

\end{document}
Table Column and Row
To create a table with row span and column span in LaTeX, you can use the \multirow and \multicolumn commands, respectively. Here’s an example of each:
Table with Row Span
\documentclass{article}
\usepackage{multirow}

\begin{document}

\begin{table}[htbp]
    \centering
    \begin{tabular}{|l|l|l|}
        \hline
        \textbf{Header 1} & \textbf{Header 2} & \textbf{Header 3} \\
        \hline
        \multirow{2}{*}{Data 1} & Data 2 & Data 3 \\
        & Data 4 & Data 5 \\
        \hline
        Data 6 & Data 7 & Data 8 \\
        \hline
    \end{tabular}
    \caption{Table with Row Span}
    \label{tab:row_span}
\end{table}

\end{document}
In this example, we utilize the multirow command to span rows. Its syntax is \multirow{number_of_rows}{width}{content}. Here, it spans 2 rows, and * for width denotes that the cell should adjust its width to fit the text.
Table with Column Span
\documentclass{article}
\usepackage{multirow}

\begin{document}

\begin{table}[htbp]
    \centering
    \begin{tabular}{|l|l|l|}
        \hline
        \textbf{Header 1} & \textbf{Header 2} & \textbf{Header 3} \\
        \hline
        Data 1 & \multicolumn{2}{c|}{Data 2 and Data 3} \\
        \hline
        Data 4 & Data 5 & Data 6 \\
        \hline
    \end{tabular}
    \caption{Table with Column Span}
    \label{tab:col_span}
\end{table}

\end{document}
In this example, \multicolumn command is used to span columns. The syntax of \multicolumn is \multicolumn{number_of_columns}{alignment}{content}. In the above example, it spans 2 columns and centers the content horizontally.
Table with Grouped Rows
To create a table with grouped rows in LaTeX, you can use the booktabs package along with the \cmidrule command to create horizontal lines spanning across multiple rows. Here’s an example:
\documentclass{article}
\usepackage{booktabs}

\begin{document}

\begin{table}[htbp]
    \centering
    \begin{tabular}{lcc}
        \toprule
        \textbf{Group} & \textbf{Value 1} & \textbf{Value 2} \\
        \midrule
        \multicolumn{3}{l}{\textit{Group A}} \\
        \cmidrule(r){1-1} \cmidrule(lr){2-3}
        Category 1 & 10 & 20 \\
        Category 2 & 15 & 25 \\
        \midrule
        \multicolumn{3}{l}{\textit{Group B}} \\
        \cmidrule(r){1-1} \cmidrule(lr){2-3}
        Category 3 & 8 & 18 \\
        Category 4 & 12 & 22 \\
        \bottomrule
    \end{tabular}
    \caption{Table with Grouped Rows}
    \label{tab:grouped_rows}
\end{table}

\end{document}
\cmidrule(r){1-1} \cmidrule(lr){2-3}is used after the group labels to draw horizontal lines spanning across the specified columns.\cmidrule(r){1-1}draws a partial rule from the first column to the first column, and\cmidrule(lr){2-3}draws a rule from the second to the third column with a little space on the right.\multicolumn{3}{l}{\textit{Group A}}is used to create a cell spanning all three columns for the group label “Group A”. Adjust the number of columns accordingly.
Table Cells
Here are examples of tables with merged cells, multirow cells, and multicolumn cells:
Table with Merged Cells
\documentclass{article}
\usepackage{multirow}

\begin{document}

\begin{table}[htbp]
    \centering
    \begin{tabular}{|l|l|l|}
        \hline
        \textbf{Header 1} & \textbf{Header 2} & \textbf{Header 3} \\
        \hline
        \multirow{2}{*}{Merged Cell} & Data 2 & Data 3 \\
        & Data 4 & Data 5 \\
        \hline
        Data 6 & Data 7 & Data 8 \\
        \hline
    \end{tabular}
    \caption{Table with Merged Cells}
    \label{tab:merged_cells}
\end{table}

\end{document}
Table with Multirow Cells
\documentclass{article}
\usepackage{multirow}

\begin{document}

\begin{table}[htbp]
    \centering
    \begin{tabular}{|l|l|l|}
        \hline
        \textbf{Header 1} & \textbf{Header 2} & \textbf{Header 3} \\
        \hline
        \multirow{2}{*}{Multirow Cell} & Data 2 & Data 3 \\
        & Data 4 & Data 5 \\
        \hline
        Data 6 & Data 7 & Data 8 \\
        \hline
    \end{tabular}
    \caption{Table with Multirow Cells}
    \label{tab:multirow_cells}
\end{table}

\end{document}
Table with Multicolumn Cells
\documentclass{article}
\usepackage{multirow}

\begin{document}

\begin{table}[htbp]
    \centering
    \begin{tabular}{|l|l|l|}
        \hline
        \textbf{Header 1} & \multicolumn{2}{c|}{\textbf{Header 2 and 3}} \\
        \hline
        Data 1 & Data 2 & Data 3 \\
        \hline
        Data 4 & Data 5 & Data 6 \\
        \hline
    \end{tabular}
    \caption{Table with Multicolumn Cells}
    \label{tab:multicolumn_cells}
\end{table}

\end{document}
In each example, the necessary commands (\multirow and \multicolumn) are used to create merged, multirow, and multicolumn cells, respectively.
Table with Siunitx for Numeric Alignment
To create a table with numerical alignment using the siunitx package in LaTeX, you need to define the column type as S (for “S-column”) in the tabular environment. Here’s an example:
\documentclass{article}
\usepackage{siunitx}
\usepackage{booktabs}

\begin{document}

\begin{table}[htbp]
    \centering
    \begin{tabular}{lS[table-format=3.2]S[table-format=2.2]}
        \toprule
        \textbf{Item} & \textbf{Price (\$)} & \textbf{Quantity} \\
        \midrule
        Apple & 1.25 & 10 \\
        Banana & 0.75 & 20 \\
        Orange & 1.00 & 15 \\
        \bottomrule
    \end{tabular}
    \caption{Table with Numeric Alignment using \texttt{siunitx}}
    \label{tab:siunitx_table}
\end{table}

\end{document}
In this example, S is used to specify the column with numerical values. The table-format option in S is used to define the alignment and number format. Adjust the table-format option according to your data format. In this case, 3.2 means three digits for the integer part and two digits for the fractional part.
Note: Make sure to include the siunitx package in your LaTeX document preamble using \usepackage{siunitx}.
Table with Booktabs Styling
Creating a table with the booktabs package typically involves using its commands \toprule, \midrule, and \bottomrule instead of \hline for horizontal lines, resulting in a more professional and aesthetically pleasing appearance. Here’s an example of how to create a table with booktabs styling:
\documentclass{article}
\usepackage{booktabs}

\begin{document}

\begin{table}[htbp]
\centering
\caption{An Example Table with Booktabs Styling}
\label{tab:booktabs}
\begin{tabular}{cc}
\toprule
Column 1 & Column 2 \\
\midrule
Value 1 & Value 2 \\
Value 3 & Value 4 \\
\bottomrule
\end{tabular}
\end{table}

\end{document}
In this example:
- We use the booktabs package to create the table with professional styling.
- Instead of using
\hlineto draw horizontal lines,\toprule,\midrule, and\bottomruleare used to draw top, middle, and bottom horizontal lines, respectively. - The
tabularenvironment is defined with two columnscc, meaning both columns will be centered. - The table content is placed within the
tabularenvironment between the\topruleand\bottomrulecommands. - The
\captionand\labelcommands are used to provide a caption and label for the table, respectively.
This will produce a table with professionally styled horizontal lines and appropriate spacing, giving a cleaner and more pleasing appearance.
Referencing Tables
To reference tables in LaTeX, you need to assign a label to each table using the \label command and then use the \ref command to refer to that label. Here’s how you can do it:
\documentclass{article}
\begin{document}

\begin{table}[htbp]
\centering
\caption{An Example Table}
\label{tab:example}
\begin{tabular}{|c|c|}
\hline
Column 1 & Column 2 \\
\hline
Value 1 & Value 2 \\
Value 3 & Value 4 \\
\hline
\end{tabular}
\end{table}

Table~\ref{tab:example} illustrates a basic example of a table.

\end{document}- The
\label{tab:example}command is placed just after the\captioncommand within thetableenvironment. This assigns the label “tab:example” to the table. - To reference this table, you use the
\ref{tab:example}command where you want the reference to appear. LaTeX will automatically replace\ref{tab:example}with the appropriate table number.
Referencing Range of Tables
In LaTeX, you can reference a range of tables using the cleveref package. This package provides the \crefrange command, which allows you to reference a range of labels. Here’s how you can do it:
\documentclass{article}
\usepackage{cleveref}

\begin{document}

As shown in \crefrange{tab:first}{tab:last}, the results indicate...

\begin{table}[htbp]
\centering
\caption{First Table}
\label{tab:first}
\begin{tabular}{|c|c|}
\hline
Column 1 & Column 2 \\
\hline
Value 1 & Value 2 \\
Value 3 & Value 4 \\
\hline
\end{tabular}
\end{table}

\begin{table}[htbp]
\centering
\caption{Second Table}
\label{tab:second}
\begin{tabular}{|c|c|}
\hline
Column 1 & Column 2 \\
\hline
Value 1 & Value 2 \\
Value 3 & Value 4 \\
\hline
\end{tabular}
\end{table}

\begin{table}[htbp]
\centering
\caption{Last Table}
\label{tab:last}
\begin{tabular}{|c|c|}
\hline
Column 1 & Column 2 \\
\hline
Value 1 & Value 2 \\
Value 3 & Value 4 \\
\hline
\end{tabular}
\end{table}

\end{document}
The \crefrange{tab:first}{tab:last} command references the range of tables labeled from “tab:first” to “tab:last”.
Multi Page Table in latex (longtable)
To create a multi-page table in LaTeX, you can use the longtable package. Here’s an example:
\documentclass{article}
\usepackage{longtable}

\begin{document}

\begin{longtable}{|c|c|}
\caption{Multi-page Table} \label{tab:multi_page_table} \\
\hline
\textbf{Column 1} & \textbf{Column 2} \\
\hline
\endfirsthead

\multicolumn{2}{c}%
{{\tablename\ \thetable{} -- Continued from previous page}} \\
\hline
\textbf{Column 1} & \textbf{Column 2} \\
\hline
\endhead

\hline \multicolumn{2}{r}{{Continued on next page}} \\
\endfoot

\hline
\endlastfoot

Value 1 & Value 2 \\
Value 3 & Value 4 \\
% Add more rows as needed
\end{longtable}

\end{document}
In this example:
- The
longtableenvironment is used instead oftabularfor the table. This allows the table to break across pages. \captionand\labelare used to provide a caption and label for the table.\endfirsthead,\endhead,\endfoot, and\endlastfootare used to specify different parts of the table for the first page, subsequent pages’ headers, footers, and the last page’s footer, respectively.\multicolumnis used to create a centered header for subsequent pages.- \hline is used to draw horizontal lines.
Conclusion
This guide provides a comprehensive guide to creating and customizing tables in Latex. It covers various aspects such as adding captions and positioning them, adjusting borders, styling with colors, managing rows and columns including spanning and grouping, handling table cells including merging and multirow/multicolumn cells, and using packages like Siunitx for numeric alignment.
Additionally, it discusses rotating tables vertically and applying professional styling with Booktabs. Moreover, it includes guidance on referencing individual tables as well as ranges of tables within your document. By following the instructions provided, users can create sophisticated and visually appealing tables to effectively present their data in Latex documents.
You can try all these example on Online Latex Editor: Overleaf