
Welcome back to the second and final part of our Django AJAX CRUD tutorial. In the previous blog, we covered the foundational aspects of creating and reading tasks using Django and AJAX. When integrating Django and AJAX Javascript, it helps in refreshing pages, adding data to the database without reloading pages. In Part 2, we will delve into the more advanced features of updating and deleting tasks, completing our journey toward a fully functional Task Management application.
Note: This tutorial is divide in 2 parts, please read our first part of this blog – Django AJAX CRUD Tutorial with Example – Part 1 (CREATE and READ)
Part 2: Updating and Deleting Tasks with Django and AJAX
Step 1: Django Views and URLs:
Add view for Update Task Status and Delete Task.
# tasks/views.py

# previous views

def update_task_status(request):
    if request.method == 'POST':
        id = request.POST.get('id')
        completed = request.POST.get('completed')
        if completed == 'true':
            completed = True
        else:
            completed = False
        task = Task.objects.get(id=id)
        task.completed = completed
        task.save()  # Save the changes to the task
        return JsonResponse({'status': 'success'})

def delete_task(request):
    if request.method == 'POST':
        id = request.POST.get('id')
        task = Task.objects.get(id=id)
        task.delete()
        return JsonResponse({'status': 'success'})
Update the URLs in the urls.py of the tasks app:
# tasks/urls.py

urlpatterns = [
    # ... (previous URLs) ...
    path('update_task_status/', views.update_task_status, name='update_task_status'),
    path('delete_task/', views.delete_task, name='delete_task'),
]
Step 2: Update HTML Template:
We begin by enhancing our user interface with checkboxes to mark tasks as completed and buttons to delete tasks. Here is the complete full html.
<!-- tasks/templates/tasks.html -->

<!DOCTYPE html>
<html>
<head>
    <title>Task Manager</title>
    <script src="https://code.jquery.com/jquery-3.6.0.min.js"></script>
</head>
<body>
    <h1>Task Manager</h1>
    <div>
        <input type="text" id="taskInput" placeholder="Enter task">
        <button id="addTaskBtn">Add Task</button>
    </div>
    <ul id="taskList">
        <!-- Tasks will be displayed here -->
    </ul>
    <script>
        $(document).ready(function() {
            // Set CSRF token for AJAX requests
            $.ajaxSetup({
                headers: { "X-CSRFToken": "{{ csrf_token }}" }
            });

            // Function to load tasks from the server
            function loadTasks() {
                $.ajax({
                    url: '/get_tasks/',
                    method: 'GET',
                    success: function(data) {
                        $('#taskList').empty();
                        data.forEach(function(task) {
                            var taskItem = '<li>' +
                                '<input type="checkbox" ' + (task.completed ? 'checked' : '') + '>' +
                                '<span>' + task.title + '</span>' +
                                '<button class="deleteTaskBtn" data-id="' + task.id + '">Delete</button>' +
                                '</li>';
                            $('#taskList').append(taskItem);
                        });
                    }
                });
            }

            // Load tasks on page load
            loadTasks();

            // Function to update task status
            $('#taskList').on('change', 'input[type="checkbox"]', function() {
                var taskId = $(this).siblings('.deleteTaskBtn').data('id');
                var completed = $(this).prop('checked');
                $.ajax({
                    url: '/update_task_status/',
                    method: 'POST',
                    data: { id: taskId, completed: completed },
                    success: function() {
                        loadTasks();
                    }
                });
            });

            // Function to delete a task
            $('#taskList').on('click', '.deleteTaskBtn', function() {
                var taskId = $(this).data('id');
                $.ajax({
                    url: '/delete_task/',
                    method: 'POST',
                    data: { id: taskId },
                    success: function() {
                        loadTasks();
                    }
                });
            });

            // Function to add a new task
            $('#addTaskBtn').click(function() {
                var title = $('#taskInput').val();
                $.ajax({
                    url: '/add_task/',
                    method: 'POST',
                    data: { title: title },
                    success: function() {
                        $('#taskInput').val('');
                        loadTasks();
                    }
                });
            });
        });
    </script>
</body>
</html>Note: For styling, please refer to our github project.
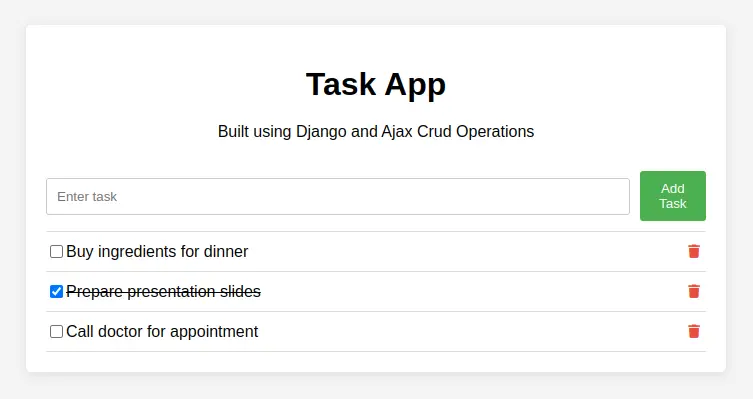
Step 3: Run Server and Test the Functionality:
Start the server by following command python manage.py runserver and go to the URL – http://localhost:8000/
Conclusion
Congratulations! You’ve successfully completed Part 2 of our Django AJAX CRUD tutorial. By incorporating checkboxes for task completion status and buttons to delete tasks, you’ve enriched the user experience of your Task Management application. You’ve also learned how to seamlessly integrate AJAX functionality into Django, resulting in a dynamic and responsive application.
With both Part 1 and Part 2 under your belt, you now possess a robust understanding of implementing CRUD operations using Django and AJAX. Feel free to further customize your application, add additional features, or explore more advanced concepts.
Thank you for joining us on this tutorial journey. Happy coding!
Find this tutorial on Github.
Blogs You Might Like to Read!
- Django Ajax CRUD – Simple User Management System
- Folder and File Structure for Django Templates: Best Practices
- Django Bootstrap – Integrate Template Example
- Best Folder and Directory Structure for a Django Project
- Django Rest Framework Tutorials
- Email OTP Verification Form using AJAX and Django Template